Categories
Haskap

Haskap Blossoms in May

Back in November I wrote a post called “Introduction to Haskap Berries (aka Honeyberries)“. Currently, this post is the most viewed post on this site – by far. And so I thought it would be appropriate to give you all an update on how my haskap are growing this year.

Actually, they’re doing quite nicely. In fact, they’ve been blossoming for about three days now.

Haskap Blossom

Haskap Blossom

I have my haskap growing in two locations. The flowers above are from the bushes on the west side of the house. They are a little more protected, have pine bark mulch around them, and seem to have the most flowers – or perhaps just the earliest flowers.

The other haskaps pictured below are on an east-facing hill with no shelter and are mulched in old hay. I don’t see as many flowers on them, but they are doing well none the less.

Haskap on May 17th

There should be honeyberries (haskap berries) ready to pick by mid to late June. I’ll hopefully get a chance to update you before then – perhaps when I put on my bird netting a couple of weeks prior to picking.

Any other good haskap pictures out there? I’d love to see ’em. Drop me a line!

Categories
Hints, Tips, and How Tos

How to Build an Inexpensive Hoop-Style Greenhouse

One of the most valuable assets in my garden is my greenhouse. It has allowed me to grow plants that I normally would not be able to grow, produce crops that the season is not usually long enough to produce, and protect my plants from frosts, hail, or other severe weather that normally would have destroyed my garden.

But I don’t have thousands of dollars to spend on a greenhouse. I just priced out an 8’x12’ greenhouse for $3,500. I would love to have a large, professional greenhouse, but that simply isn’t financially feasible for me. So, instead I’ve found a way to make a large greenhouse that is functional, easy to build, and inexpensive. This article will explain to you exactly how to build a 12’x32’ hoop-style greenhouse for under $400.

Categories
Commentary

Yup. I’m A Locavore.

Hello. My name is Dave and I’m a locavore. I’ve actually been a locavore for years, but I’ve only just come to realize it. Now in case you aren’t too sure just what a locavore is, read what Wikipedia has to say about it:

A locavore is someone who eats food grown or produced locally or within a certain radius such as 50, 100, or 150 miles. The locavore movement encourages consumers to buy from farmers’ markets or even to produce their own food, with the argument that fresh, local products are more nutritious and taste better. Local grown food is an environmentally friendly means of obtaining food, since supermarkets that import their food use more fossil fuels and non-renewable resources.

Through out my life, the majority of my food has come from within 50 miles of where I live. Well, actually, more like 50 feet. Growing up on a farm with cows, pigs, chickens, and a large garden – most of our food was home-grown. So even without realizing it, my family and I were all locavores!

Now I realize that not everyone has the luxury of living in the country, and it may be a little harder for you to live off the fruits of your labours – but I think anyone can (any anyone should) be a locavore. It just makes sense. So here are just a few ideas of how you can be a locavore too.

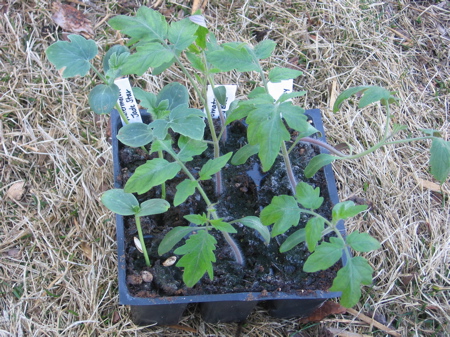
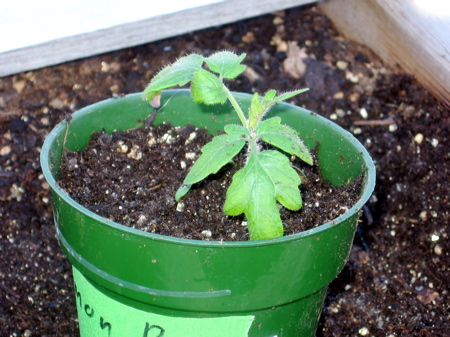
To a certain extent, you can grow your own food. Perhaps not everything or even a large percentage of your food can be grown at home, but you can do something. Even if you have a small yard, you could plant a small Square Foot Garden and perhaps a fruit tree or two. If you live in an apartment with just a balcony, you can still have a variety of container grown plants like strawberries, herbs, carrots, or a multitude of other things. If you’ve never tried it, I guarantee you that home-grown food always tastes better!

Another way to eat local is to shop at your local Farmer’s Market. Alberta has a fantastic selection of Farmer’s Markets. From big cities to small towns, you can find fresh, locally grown produce all over the province. Not only do you support your local farmers, but you also end up with a superior product.

And one other option that you’ll certainly want to explore is your local u-pick farm. I am a big fan of being able to pick what I eat right off the tree/vine/bush. U-pick’s are a great place to take the family out for a leisurely afternoon to enjoy quality time together as well as to enjoy great tasting, locally-grown food.

So why not become a locavore? It’s easy, it’s tasty, and it’s even good for the environment!

Categories
Hints, Tips, and How Tos

Protecting Your Tender Plants From A Spring Freeze

Last spring I bought six kiwi seedlings. Within a couple days of getting planted, they were promptly destroyed by a fierce hail storm. This year I thought I’d try again. I order a few more kiwis and they arrived yesterday. So not wanting them to linger in the box any longer than they needed to, I planted them promptly. However, this morning the weather forecast tells me to expect -6° C overnight. True, the kiwis I ordered were the ‘Arctic Beauty’ variety, but I didn’t really want to push them. I needed to protect them from freezing somehow.

So what to do?

After doing a little research, I discovered a couple of ways I could go about preserving them. Bringing them inside wasn’t an option I wanted to entertain (digging them up, bringing them indoors, planting them in a pot, and three days later transplanting them back in the ground just didn’t seem like a good idea). Putting a tent up over top of them with a little electric heater inside would be tricky (as the rain had already deeply puddled around my new seedlings and I’ve never liked the idea of being electrocuted). So the logical step was just to put an upside down bucket over top of the plants. I had built my trellises with enough clearance underneath to fit a three gallon bucket.

Rumors have it that the temperature under the bucket should stay 3-4° warmer than the air outside. If this is the case, my kiwis should be ok. But time will tell. If it didn’t work I’ll be sure to put an update at the end of this post.

Just one note: If you try this method, be sure to take the bucket off in the morning and put it back in the evening if you suspect cold temperature. Your plants will need the light and the fresh air.

Categories
Hints, Tips, and How Tos

When Can I Plant My Garden?

Well, it’s May and by now every gardener in Alberta is biting at the bit to get out there and plant their garden. Traditionally in these parts, gardens get planted on the May long weekend – this year landing on May 16th through 19th. Two years ago I planted my garden the first weekend in May and suffered no ill effects, but I don’t think I would dare do that every year. So what’s a gardener to do?

Find Your Frost Date

To start, find out what the ‘average last frost date’ in your area is. BE SPECIFIC. These can vary greatly from place to place. For example, Red Deer’s frost date is May 25. I live just 15 minutes south east of Red Deer, near Pine Lake. Pine Lake’s frost date is June 9th. That’s a whole 2 weeks difference!

And you can’t even guess based on north/south location. Hannah (south) & Edmonton (north) both have a frost date of May 10th! By the way, I think it is very unfair that Edmontonians (150 km north of me) should get to start their gardens a whole month before me! But that’s the way it is.

You can find the frost dates for your area at the Alberta Agriculture & Rural Development website.

Check the Forecast

Secondly, watch the long range forecasts for your area. I personally like the Environment Canada website, but they only forecast five days in advance. So for the long range forecast, I go to Accuweather Canada. They have a 15 day forecast that, of course, isn’t quite as accurate, but it gives you a good idea.

Guess, Hope, & Trust

All the averages and all the forecasts in the world will NOT guarantee that frosts or snow will not arrive after you’ve planted your garden. There comes a point when you just have to go for it.

For me, I’ve worked out a bit of a forumla: If it’s May, if the long range forecast has nothing colder than plus 2°, if it hasn’t pouring rain, and if I feel like it – then I plant my garden! Perhaps not the most scientific method, but thus far it’s worked for me.

This year things are shaping up to be ready to plant… [looking at accuweather forecast] Hmmmm. May 16th – the May long weekend. Go figure.

Categories
Garden Plans Hints, Tips, and How Tos

Transplanting Tomatoes

Today was the day to transplant my tomato seedlings, and I think I may have done it a little differently than you might expect. Or perhaps you’ve done it this way all your life and I’m just catching on to it now. Either way, here’s what I did.

Now if you’re wondering when to transplant, my seedlings are now four weeks old and stand about about four inches tall. Ideally, I think you’d want to give them another week or so, and do the big move when they’re about five inches tall. But, I was in a hurry and was itching to get things moving.

Tomato & Watermelon Seedlings ready to transplant

First of all, I gave my tomato seedlings one more watering before I transplanted them. Not only does that make it easier on the plant, but it also makes it easier to get out of the container. Then I took my three inch pot (that I was transplanting into) and put just a small layer of dirt in the bottom. So far, not so unusual.

Here’s what you might not normally do. I took my tomato plant and laid it down sideways in the container (as much as I could in that small space). Then I buried as much of it as I could, leaving just the top leaves showing.

My transplanted tomato

Now, why on earth would I do that? Well you see, when you bury a tomato stem, it will send out roots. These extra roots will make the plant stronger and healthier. To further improve your tomato’s root systems, do this again when you plant him in the ground. Just dig a little trench, lay the plant down in the trench, bury it and keep the top sticking out of the ground.

Don’t believe me? Try it yourself!

Categories
Growing

Time To Start My Corn Seedlings

Today I planted some corn. I’ve never planted corn as indoor seedlings before, but after attending the Veggie Basics Course held by Alberta Agriculture, I’m thinking that a three week head start on the season might just be what my corn needs. Why? Because for the last two years this is about all I got…

Cornless Corn

Just nice looking plants. Not much to eat though. So after Jennifer from www.alibisrandom.blogspot.com reminded me that it is “only three more weeks until garden time”, I decided it was time to start some corn.

I had planned on one large corn patch of two varieties, but after reading a little about corn, I discovered that you may not get the kind of corn you want if you plant two varieties. In order to stay true to the variety of corn you plant, different varieties must be at least 100 ft. apart (so they say). I have two garden patches this year, so if I plant corn in the farthest edges of the two, they’ll end up being about 60 ft apart. So that’ll have to do. If it isn’t far enough – well, hopefully the corn I’m starting now will be finished pollinating before the later corn is ready to begin. And if that still doesn’t work out, maybe I’ll get funny corn. Either way, it’s worth a try.

So the variety that I’m planting today is ‘Fleet Bi-color’. Its very early for corn – just 59 days. If I’m calculating right, that should give me corn on July 26th. Hmmm, I’m not sure I’m that optimistic.

Categories
Hints, Tips, and How Tos

Yellow Leaves On Your Seedlings?

Over the past few days I’ve noticed two things. First, my cucumber seedlings have a tendency to die for some reason. Secondly, many of my plants have a growing yellow tint. Some tiny spots on the leaves have gone brown. Like this…

Yellow Leaves on my pumpkin seedlings

This hadn’t happened in the two previous years of starting seedlings indoors, so I wasn’t sure what I was doing wrong.
So I did a little research on the internet and it wasn’t hard to find the answer. It was… lack of fertilizer. As I was reading several articles that explained this to me, I realize that I had neglected to fertilize my seedlings this year! So, today I gave them a healthy dose of fertilizer (though I was tempted to do extra, I refrained…). We’ll see how long it takes for them to recover and if my problem was actually what I think it was.

If you’ve got a more accurate understanding of the problem, let me know!

Categories
Commentary

Why It’s So Difficult To Be An Alberta Gardener

A picture is worth a thousand words, so let me just say this:

April 12, 2008

+24° Celsius. (75° F.)

Beautiful warm day - April 12


April 21, 2008

-11° Celsius (12° F)

Miserable Cold Day - April 21


And that is why it is so hard to be an Alberta Gardener!

Categories
Growing

Starting Tomato, Cucumber, Watermelon, and Pepper Seedlings

Yesterday, April 7, 2008 , I planted my first seeds of the year. If you’ve never started your own plants from seed before, you’ve got to try it – it’s amazingly simple! Here’s what I did.

First I collected my supplies:

  • A plastic starter tray complete with transplanting inserts (72 cells)
  • Some potting soil
  • Plastic labels (plastic margarine container lids cut into strips)
  • And yes, seeds
Planting Seedlings

Then I filled the cells with the potting soil and lightly patted them down. Each cell then received a finger poke in the center. My daughter and I then dropped two seeds in each little hole. (The weaker of the two seedlings will get pinched out after they’ve sprouted.)

Here’s what I planted: