For years I’ve had great plans to build a garden trellis for my many varieties of grapes & kiwis – and finally this summer I took the plunge. I built a simple, but solid trellis for the vines I have growing along the south side of my garage. It’s probably a little bit over-kill, but it’s certainly able to hold the weight of all my grapes and kiwis (which is actually pretty significant – as I have two grape vines and two kiwis and all those vines, leaves, and fruit can get heavy!)
So if you’ve been looking to build a trellis in your own backyard, let me show you my design:
First of all – my materials list.
- (3) 4 x 4 x 12′
- (1) 4 x 4 x 8′ – (since my one section is under my garage window)
- (17) 2 x 4 x 8′
- (1) 2 x 4 x 12′
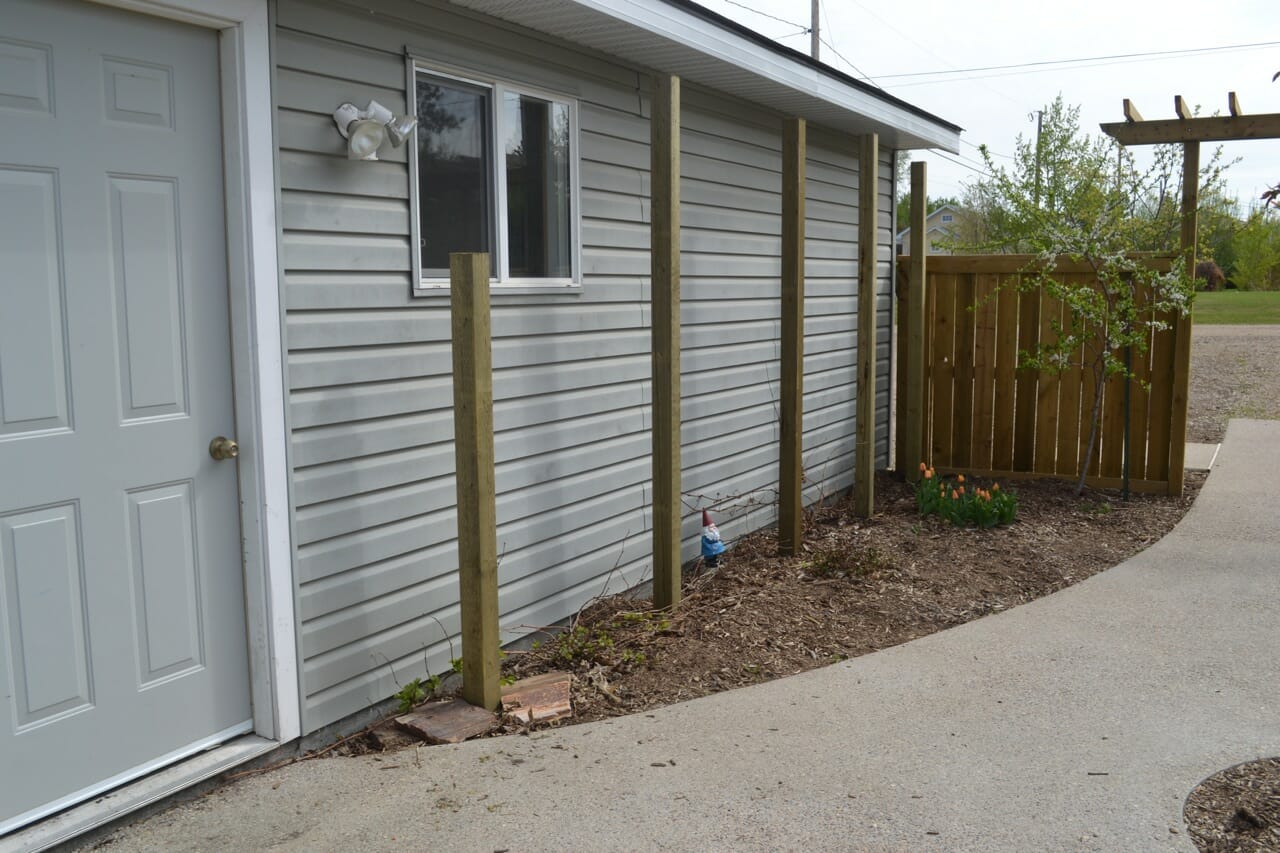
The first thing to do was to dig my post holes. I dug 6″ holes about 32″ deep – spaced 4′ apart – about 1′ from my garage wall.
The 12′ posts were too tall to fit beneath my garage eaves (even when planted 32″ deep), so I had to trim a few inches off the tops to fit just under my eaves. I had a window (as you can see in the picture below) that I didn’t want to cover up, so I planned to build that section at half height. Once the posts were in, I backfilled with gravel and tamped them in. You could use concrete if you like, but I think gravel holds it just as well (if it’s well tamped) and it allows the water to drain away from the post so it doesn’t rot.
Once the posts were all trimmed to the proper, level height, I simply attached the 12′ 2 x 4 to the top of the taller sections, and a 4′ section of 2 x 4 for the shorter one.
 Next, I ripped the remaining 2x4s in half – giving me 2x2s. (The actual dimensions were 1.5″ by 1.5″)
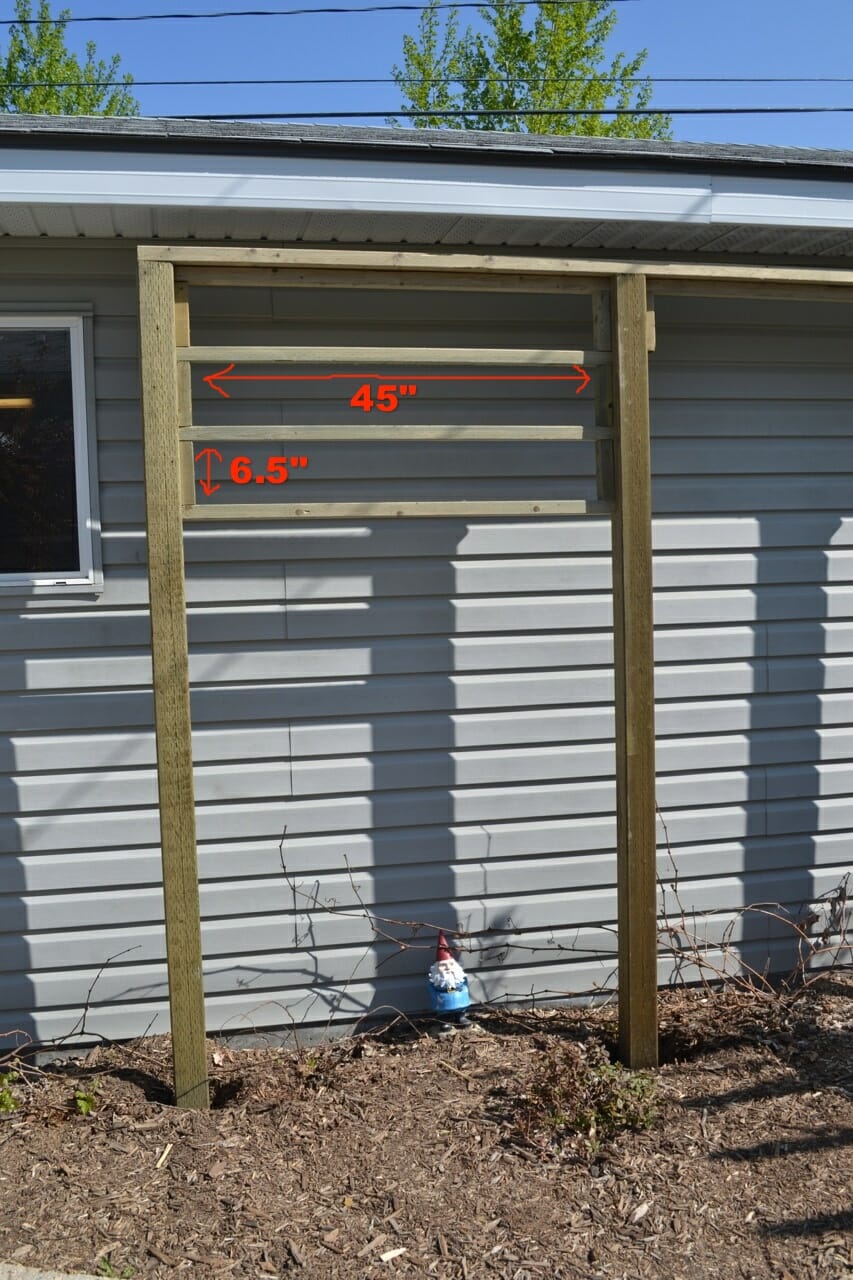
Then I proceded attach the 2x2s horizontally between my posts. The posts were spaced with 4′ centers, so the actual length of the horizontal pieces was 45″. Underneath each horizontal piece, I attached a short piece (6.5″) to the 4×4 sides to give the proper spacing of 8″ centers. These shorter blocks also provide a ledge to screw the horizontal pieces into.
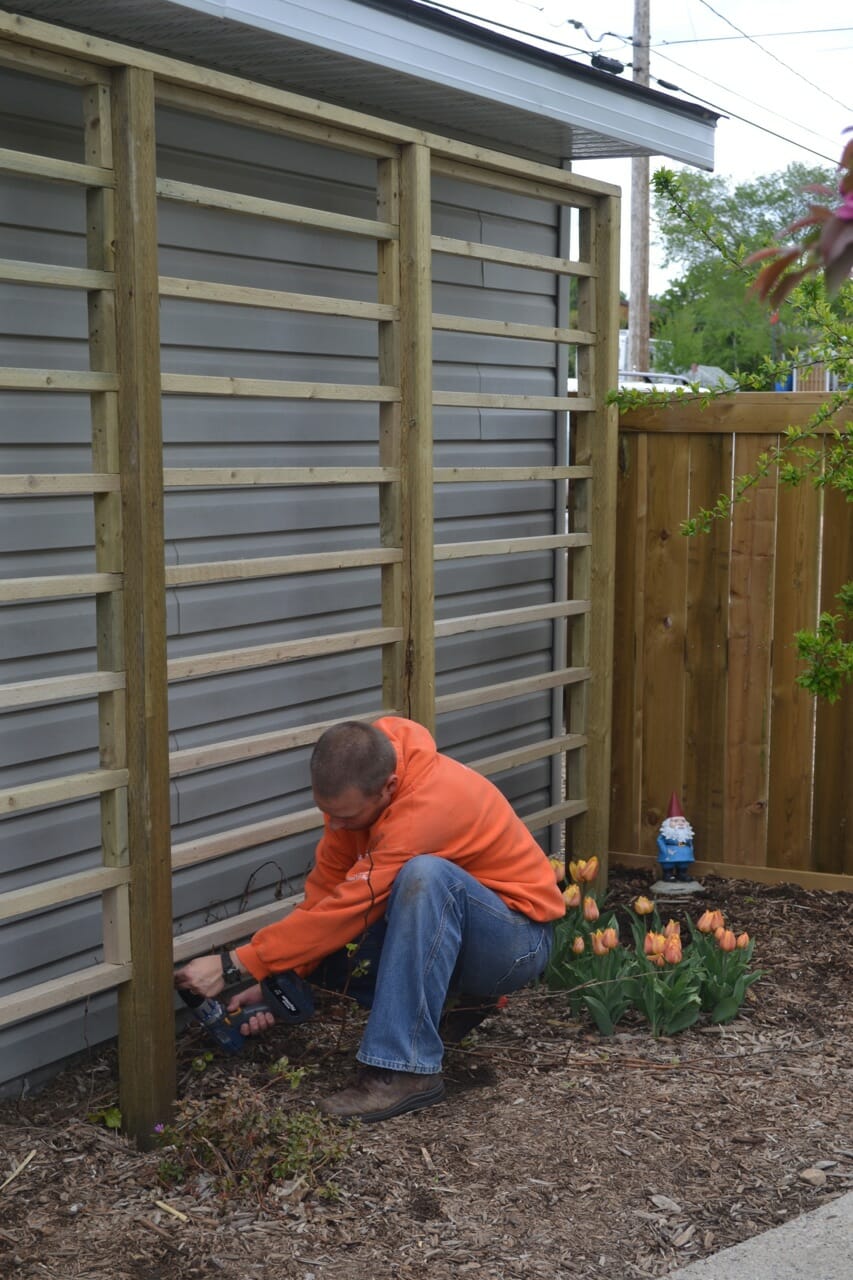
Once all the horizontal pieces had gone on, I was ready to attach the vertical pieces – and believe it or not – I was almost done! I told you this was simple!
 With the posts perfectly spaced at 4′ centers, these vertical pieces attached every 9″ between the posts. That means that the squares of the grid aren’t perfectly ‘square’, but are 8″ x 9″. I made the length of my vertical pieces so that the ends were about 8″ lower than the lowest horizontal piece. (You will have to measure the total overall height of your trellis to find this measurement.)
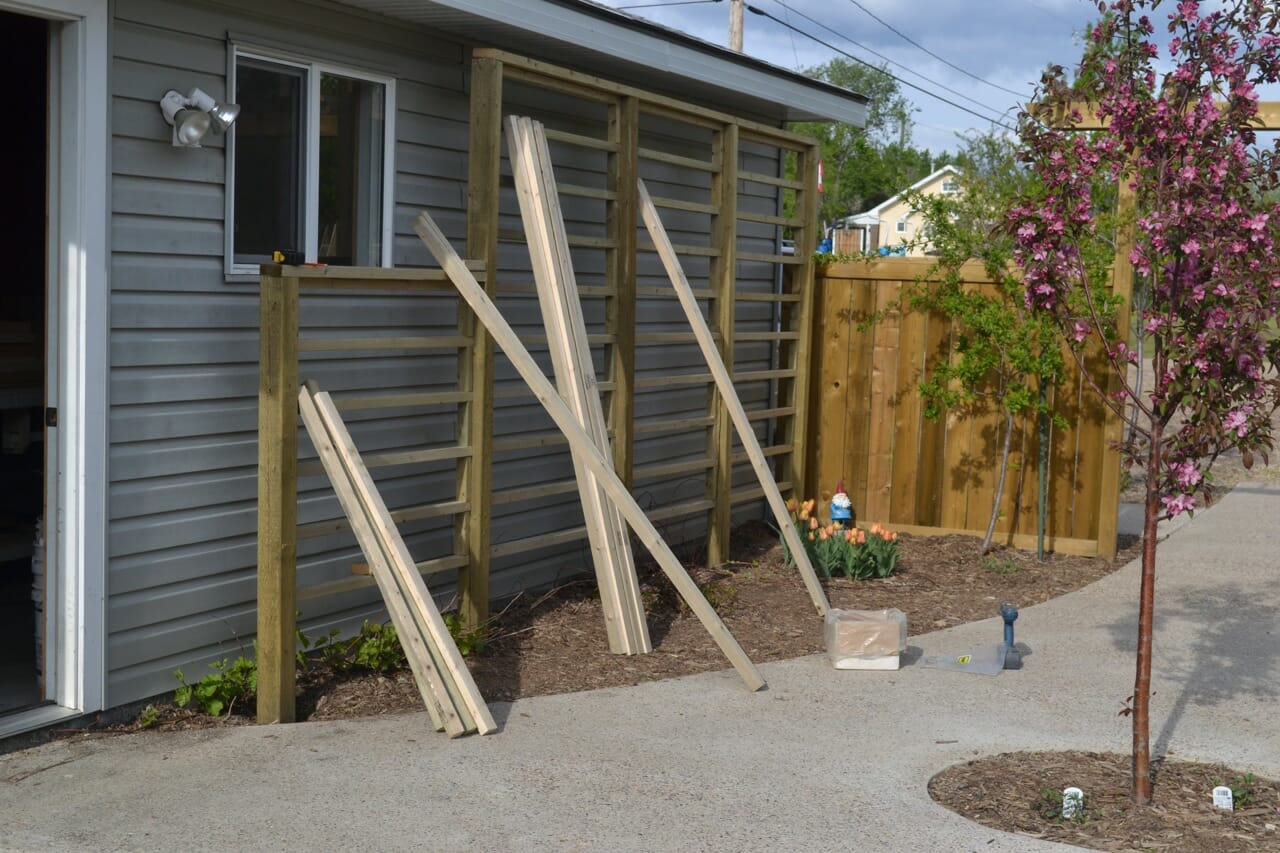
And that’s it! Your trellis is ready for grapes, kiwis, and whatever else you can throw at it!
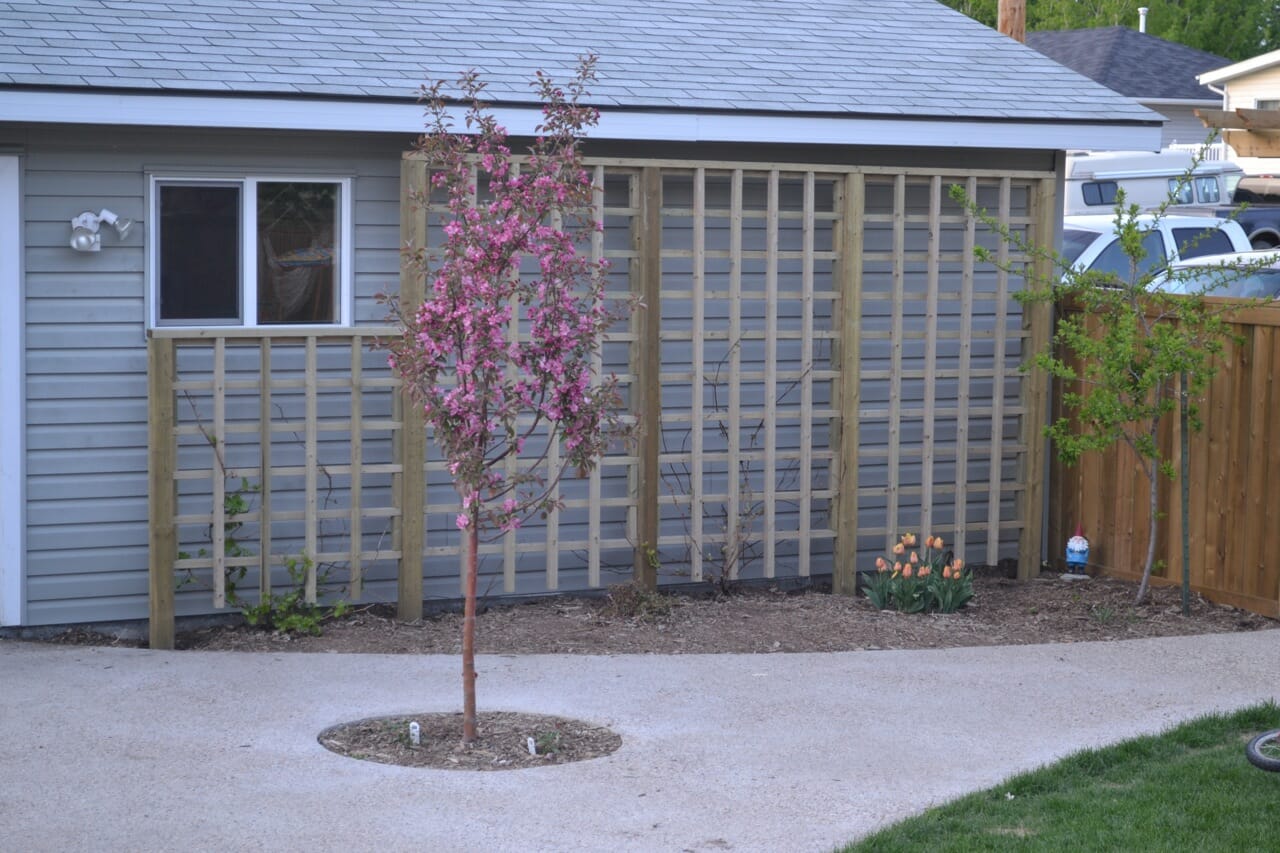
This is my final product! You can see my two grapes starting to leaf out. The kiwis hadn’t yet made their appearance. At first, I thought I had made it too massive for those few little plants, but by the end of the summer, the entire structure was COVERED with vines! I even had to trim them back a couple of times. So I was glad that I had made it as beefy as I did.
You can read this post about my grape harvest!
If you’re planning to build a trellis this next year, feel free to use my design! I’d love to see what you build!
Questions? Comments? Leave ’em below!
7 replies on “How to Build a Garden Trellis for Grapes and Kiwis”
Simple, solid and well done, not sure about the kiwis but i bet you the grapes will have that completely covered in a few years
Good work,,,I put chicken wire on my fence,then put the 1×2 trellis as a T on top the fence going out 4′ on each side of the fence…Worked well. Having trouble getting fruit on the kiwi,but grapes went crazy.
With your trellis do you still take the vines off the trellis for the winter and cover the vines? Or are the vines mature enough to survive the winter without covering them?
Isaac: I leave my vines on through the winter. They seem to do just fine!
I’m curious, do you have any problems with the grape vines growing towards the house? I love the trellis, but I’d be concerned that the vines would decide to “take over” and damage the siding.
Just happened upon this while doing some research. Love the trellis design. I’d have to finance this now in 2021 with the price of lumber as of this posting. LoL.
Hi there! We are planting Assai kiwi vines this year on our garage trellis. It’s large, but wondering if we should reinforce it with metal bars to strengthen it so it can bear the weight of the kiwi vines when they fruit. Our garage wall gets full sun, so it sounds similar to your set up. How many pounds of fruit would you guess that your vines produce? Or do you have a photo of them at their fullest growth? Trying to figure out if our trellis is strong enough before we plant. Appreciate any help or advice you may have to offer!