Categories
Seed & Plant Reviews

The Winner of the 2009 Tomato Awards Is… Sweet Cluster!

I don’t know if you’ve picked up on this yet, but I like tomatoes. I’m pretty sure that, to date, they are my favorite thing to grow. This year I planted six varieties and I thought I’d share my thoughts on which ones I thought were best. (Not all tomatoes are created equal, you know.) So without further ado, may I present to you – The 2009 Tomato Awards!… Also known as Dave’s Favs for 2009… Or Tomatoes I like… Or whatever.

Starting at the top, my number one pick for tomatoes this year is…

Sweet Cluster Tomato

#1. Sweet Cluster

I like to eat my tomatoes like apples and this is the perfect variety for doing just that. They are the perfect size – about the size of a lightbulb, but a very nice round shape. They also produce like mad! They produce in clusters (thus the name) of about six or more tomatoes. These are hands down my favorite tomato of 2009.

#2. Sweet 100

Now this ranking may be a little skewed. I love cherry tomatoes and this was the only variety that I planted this year – so it automatically makes it into the top by default. The flavor was good, but I think I have had better cherry tomatoes (just not this year). I do have to say I was impress with their production though – lots of long trailing clusters.

#3. Lemon Boy

I do have a thing for the slightly unusual when it comes to gardening, so yellow tomatoes certainly have an attraction for me. But I do really like the flavor and texture of the lemon boy tomatoes. This is one that I’ll be planting on a regular basis in years to come.

The Others

The rest of these were fine and good. All of them were quite edible, but they weren’t anything really special. They were “just tomatoes”. So in no particular order…

Brandywine – There were kinda fun because they grow very large. I sliced one up for lunch and I hardly had room on my plate for anything else. This is what you want to grow if you want to out-grow your neighbor.

Beefmaster – Mine were pretty ugly looking. Quite bulgy, like someone was trying to fit two tomatoes into one skin. Still tastes good though. Can’t tell its shape when you turn it into salsa…

Better Boy – This is your all-round average, all-purpose tomato. It’s nice. It’s good. Not much else to say about it.

So that’s my tomatoes of 2009. I’m ready to start planning for 2010, so if you’ve got some favorites that you’re willing to share – leave a comment!

Categories
Hints, Tips, and How Tos

Can Milk Jugs Help Grow Tomatoes?

Well, I’m trying something new in my greenhouse this year – milk jugs. Yup, milk jugs. Here’s the theory… All along my row of tomato plants are old milk jugs full of water. All day long the sun warms up the water in those jugs. According to science, water holds heat better than air. So when it gets cool at night, the air in my greenhouse will cool off much quicker than the water in the milk jugs. Thus, the heat in the milk jugs will slowly release through the night – heating the air around them. That means my tomatoes stay warmer longer. It’s kinda like a heat battery for greenhouses. The more milk jugs of water, the more heat is saved up all day and released all night.

So does it work? Well, I can’t really say yet. When I did my first thermometer test, the temperature on the ground six inches from the a milk jug was 0.6 degrees warmer than the temperature at knee height three feet away. So if warm air rises, the knee height should have been warmer. Tonight I’m going to take a another temperature test – one near and one away from the jugs – this time both at knee height. I’ll try to keep you posted.

I still need to seal up my greenhouse a little better so the warm air has a harder time sneaking out at night, so it’s hard to say if the milk jugs are really doing much good. But I’m pretty sure they aren’t hurting anything – at least my tomatoes aren’t complaining…. Take  a look!

Tomato Clusters

Nice, huh? Here’s another shot…

Heat Batteries

Has anyone else tried something like this? How has it worked?

Update September 28: Last night the temperature dropped to -4.7° C. Inside the greenhouse on the far side away from the jugs the temperature dropped to 0.2° C. But near the milk jugs the temperature got no lower than 2.3° C. So, I’m impressed.

Categories
Growing Just Photos

Better Late Then Never

After getting started tremendously late (due to landscaping issues), my garden isn’t looking too bad – all things considered. My corn and beans are growing nice. Peas… not so much. After the birds pecked them to nothing they’ve been slow to recover. I might get a taste, but certainly not anything for the freezer. Carrots…well, let’s just say that their current average height is about one inch. Radishes grew tall, flowered, and had nothing to show for it at the bottom.

But potatoes…. Now they might do something. I’ll at least have a good stock of baby potatoes if nothing else.

Potato flowers

Now that my greenhouse is up, my tomatoes are coming along too. I’ve got some good golfball+ tomatoes right now and lots of flowers.

Tomato Flowers in my greenhouse

And of course, old reliable. The one that never fails. Rain or shine, sheet or hail. Nothing can stop… the weeds! But at least something is growing. And they’re kinda pretty too.

Pretty Weeds

Categories
Growing Hints, Tips, and How Tos

Seven Essentials to Growing Tomatoes

This is my third season of growing tomatoes, and believe me, I have learned a lot in three years. But perhaps one of my greatest sources of knowledge came from a Hydroponic Tomato Growers Workshop that I attended last spring in California. This workshop was geared towards people who were considering starting their own greenhouse tomato business. This was a HUGE source of information for me! There were so many things that I wasn’t doing, and so many things that I was doing in the wrong way. So, from my experience and from what I learned at that workshop, here are are Seven Essentials to Growing Tomatoes.
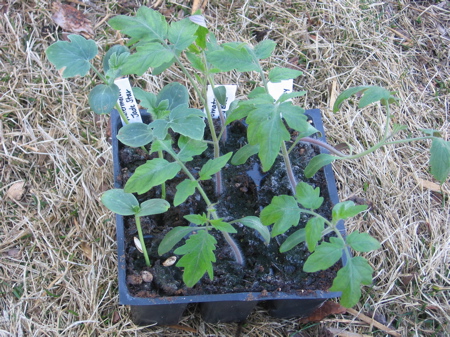
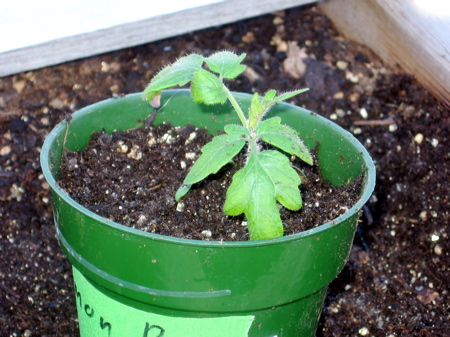
Me & the tomatoes

#1. Start ’em Early

Ok, you probably knew this one. In Canada our growing season is so short, not only due to the cold, but also due to our limited sunlight hours in the winter. We do have enough sunlight to grow foliage (like lettuce and the like), but we don’t get enough sunlight to produce fruit until about March. So if you have a sunny south window (or artificial lighting), start your tomato plants in late February/early March. That should give you a well established plant to transplant into your greenhouse. Read more about transplanting tomatoes…

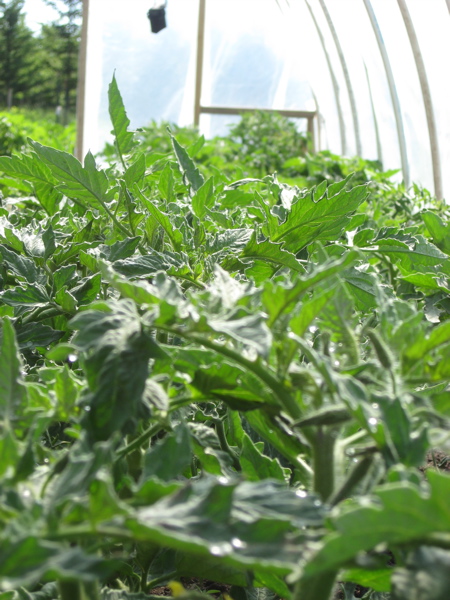
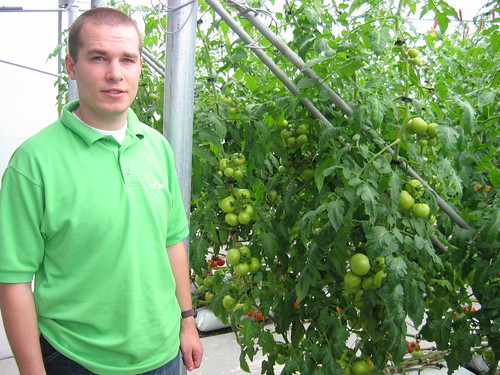
#2. Grow Tomatoes in a Greenhouse

You know, tomatoes can be grown in the great outdoors, but they will be one or two months behind those that are in a greenhouse. I’m not sure how many frost-free days you have in your specific area, but you probably don’t want to lose two months of them.

So build a little greenhouse. It doesn’t have to be huge, although you can build a good sized greenhouse for little money as this article explains. Otherwise, Alberta’s weather may greatly hamper your bumper crop.

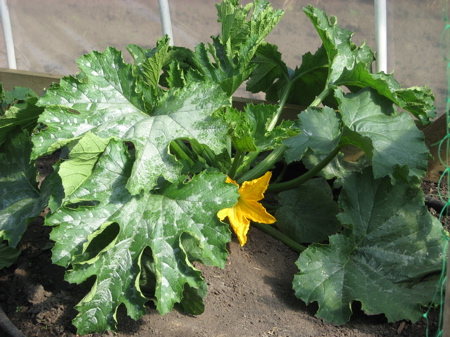
#3. Don’t Plant ‘Em Too Close

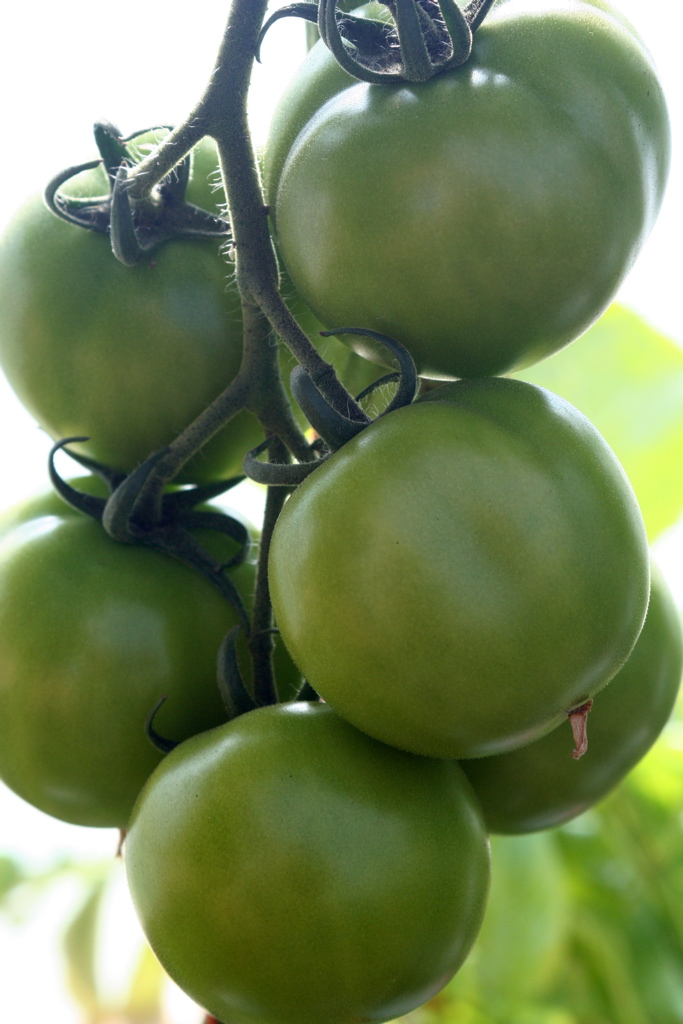
This can be said for lots of things. But especially tomatoes. They are such little plants when you transplant them, it’s easy to forget what a jungle they will grow to be in a couple of months. I did it. (twice) My mother-in-law did it. But don’t do it.

Tomatoes need proper air circulation, not to mention that pruning a jungle is difficult. The exact spacing will vary with variety, but as a general rule, put at least two feet between plants.
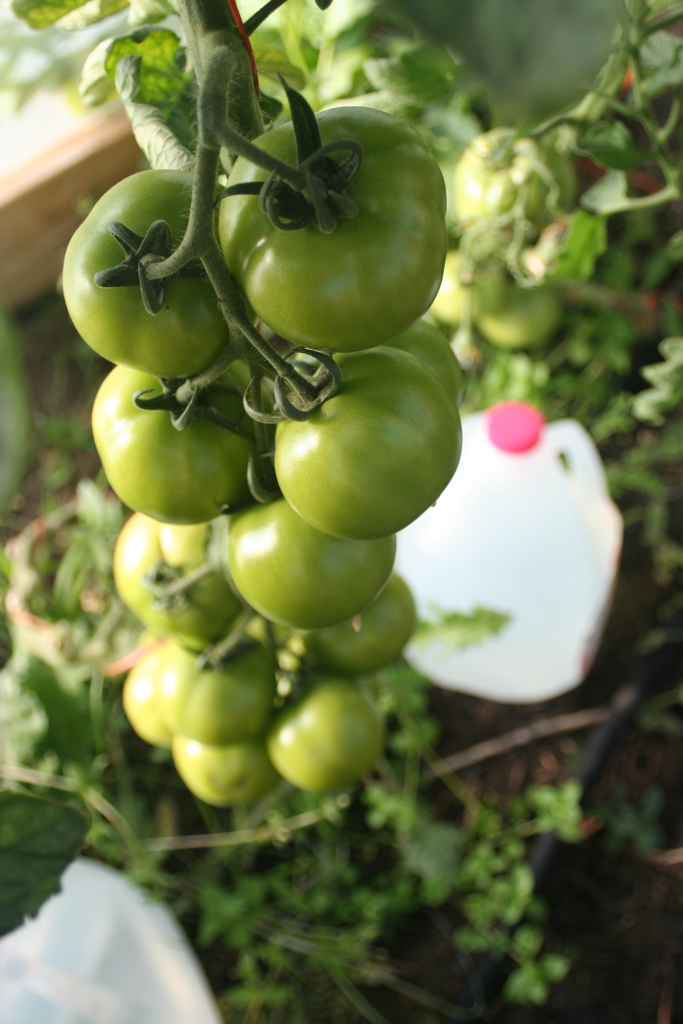
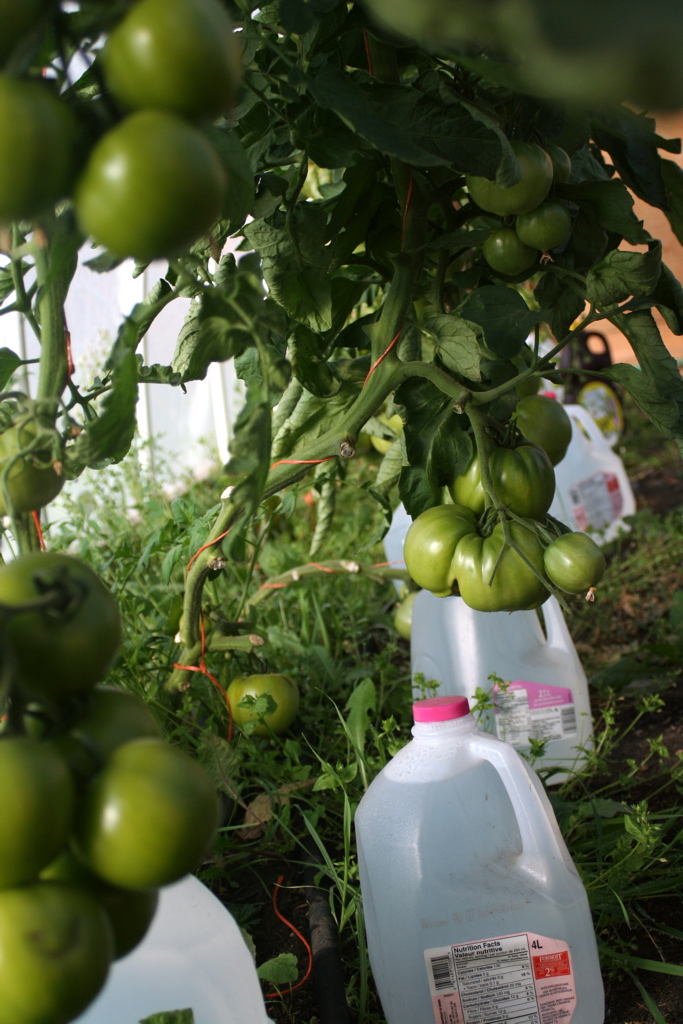
#4. Mulch Like Crazy

A good layer of straw mulch will help in a couple of ways. First of all, it’ll suppress the weeds. (That alone is worth it.) Secondly, it’ll keep the soil moist. Tomatoes are heavy drinkers and need a lot of water. A drip irrigation system coupled with a good thick mulch will make sure your tomatoes get the water they need. Just be sure not to over water – that’s what causes your tomatoes to split.
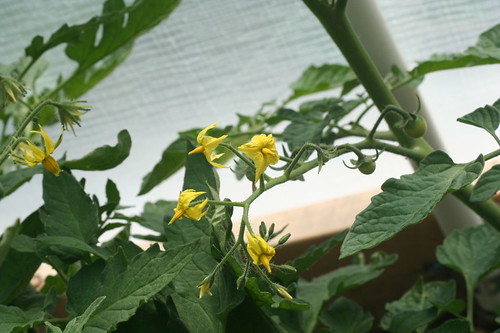
#5. Prune Often

This is the one that often gets missed. Some people believe that the more leaves the plant has, the more energy the plant will receive. THIS IS NOT TRUE. Yes, plants do need some leaves, but too many leaves will actually drain energy away from the plant. All the water and nutrients that the roots soak up must be distributed to those extra leaves, instead of the fruit. So here’s what you need to do.

First, eliminate all suckers. Suckers are the little shoots that appear in the elbow between the stem and a branch. Just bend it over and it will snap right off.

Tomatoes Needing Pruning

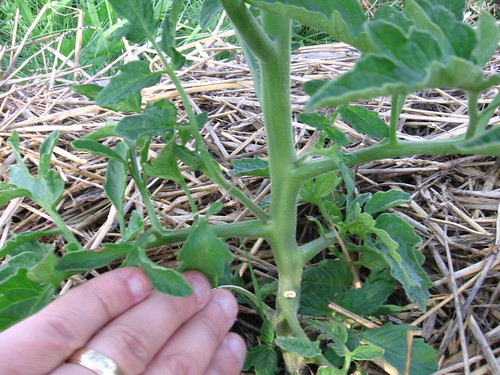
Secondly, remove any branches that are brown or wilting at the bottom. These do your plant no good. Get rid of them. For these, grasp the stem firmly in your hand and push the branch down with your thumb – it will snap off at its natural breaking point.

Did you know that it only takes three branches to support one cluster of fruit? A healthy, unstressed tomato plant should put out three branches, then a cluster of fruit, three more branches, another cluster of fruit, etc… Once the tomato plant has reached a good size, you can start removing three branches per week from the bottom of your plant. Thus, by the time you are ready to pick your tomatoes, there will be no leaves below that fruit cluster. Sounds crazy, I know – but that’s what the professionals do!

Note: For all tomato pruning, avoid cutting them off with a knife or other tools. Snapping them out with your fingers is very easy and the wound caused by breaking heals quickly. A cut is more likely to allow disease to enter.

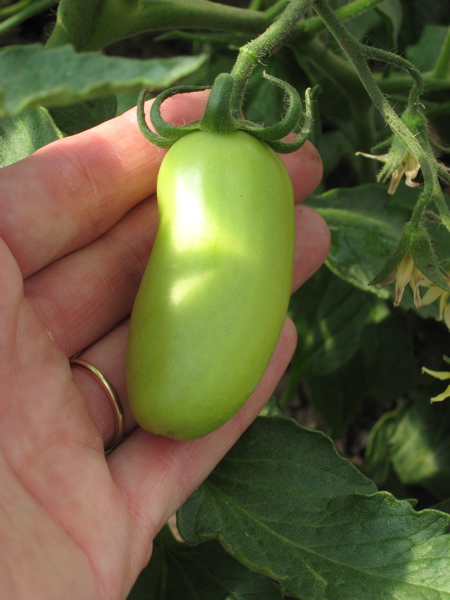
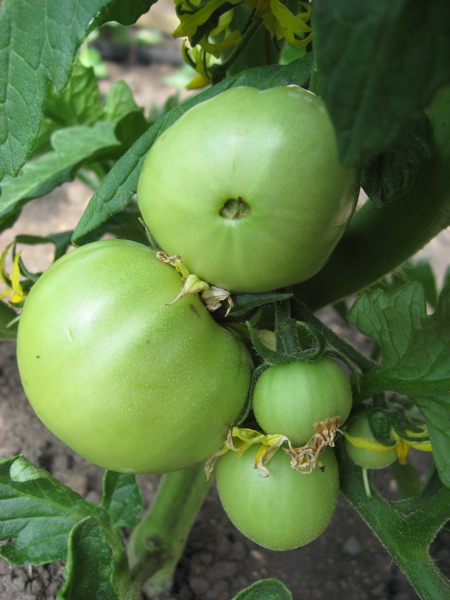
#6. Pick BEFORE Tomatoes Are Ripe

This is another one that sounds crazy. Popular belief would have you “vine-ripen” your tomatoes. Surely they are sweeter, tastier, and probably better for you…. NONSENSE.

The fact is, by the time the tomato just starts to turn color (that slight greeny-orange color), it already has all of it’s goodness in it. And it’s actually the seeds inside that make the tomato ripen. As the seeds release ethylene (the gas applied to green bananas to make them turn yellow), the tomato ripens.

Don’t get this confused with the tomatoes in the store that are picked green and sprayed with ethylene – these are picked too early and do NOT have all the goodness inside yet.

So why not let them stay on the vine? A plant’s job is to reproduce itself. If the plant thinks it has successfully produced fruit, it will begin to shut down and produce less. But if you take the fruit away before it sends the “Mission Accomplished” signal to the plant, the vine will continue to pour it’s energy into producing fruit. (I hope I didn’t get too scientific for you there…)

#7. NEVER Refrigerate Tomatoes

Store tomatoes at room temperature. Never refrigerate. Temperatures below 12° for even a half an hour will begin to destroy the flavor. They may keep longer, but the amazing flavor that comes from a home-grown tomato will be lost.

So there you have it – not a comprehensive list by any means, but it’ll certainly get you on your way to growing delicious tomatoes in your own backyard. If you know of any other essentials to growing tomatoes, feel free to leave your comments!


Categories
Just Photos

Greenhouse Update

Remember the article I wrote back in May about How To Build An Inexpensive Hoop-frame Greenhouse? Well, my mother-in-law (who is greatly enjoying her Mother’s Day present), took some pictures of the things she has growing in there. So I thought I’d share them here to further inspire you to build your own greenhouse next year.

Tomatoes down the length of the greenhouse

Mom's Greenhouse

Roma Tomatoes

Mom's Greenhouse (tomatoes)

Beefsteak Tomatoes

Mom's Greenhouse (tomatoes)

Zucchini

Mom's Greenhouse (zucchini)

Beans

Mom's Greenhouse (beans)

Watermelon

Mom's Greenhouse (watermelon)

Peppers

Mom's Greenhouse (peppers)

Inspired yet?

Oh, and incidentally… I just visited my brother’s A-frame greenhouse, built in the same style as my plasticless A-frame greenhouse, and it’s doing beautifully. He used the woven poly from Northern Greenhouse Sales and it’s showing no signs of wear. I am absolutely going with their plastic next year.

Categories
Garden Plans Hints, Tips, and How Tos

Transplanting Tomatoes

Today was the day to transplant my tomato seedlings, and I think I may have done it a little differently than you might expect. Or perhaps you’ve done it this way all your life and I’m just catching on to it now. Either way, here’s what I did.

Now if you’re wondering when to transplant, my seedlings are now four weeks old and stand about about four inches tall. Ideally, I think you’d want to give them another week or so, and do the big move when they’re about five inches tall. But, I was in a hurry and was itching to get things moving.

Tomato & Watermelon Seedlings ready to transplant

First of all, I gave my tomato seedlings one more watering before I transplanted them. Not only does that make it easier on the plant, but it also makes it easier to get out of the container. Then I took my three inch pot (that I was transplanting into) and put just a small layer of dirt in the bottom. So far, not so unusual.

Here’s what you might not normally do. I took my tomato plant and laid it down sideways in the container (as much as I could in that small space). Then I buried as much of it as I could, leaving just the top leaves showing.

My transplanted tomato

Now, why on earth would I do that? Well you see, when you bury a tomato stem, it will send out roots. These extra roots will make the plant stronger and healthier. To further improve your tomato’s root systems, do this again when you plant him in the ground. Just dig a little trench, lay the plant down in the trench, bury it and keep the top sticking out of the ground.

Don’t believe me? Try it yourself!

Categories
Growing

Starting Tomato, Cucumber, Watermelon, and Pepper Seedlings

Yesterday, April 7, 2008 , I planted my first seeds of the year. If you’ve never started your own plants from seed before, you’ve got to try it – it’s amazingly simple! Here’s what I did.

First I collected my supplies:

  • A plastic starter tray complete with transplanting inserts (72 cells)
  • Some potting soil
  • Plastic labels (plastic margarine container lids cut into strips)
  • And yes, seeds
Planting Seedlings

Then I filled the cells with the potting soil and lightly patted them down. Each cell then received a finger poke in the center. My daughter and I then dropped two seeds in each little hole. (The weaker of the two seedlings will get pinched out after they’ve sprouted.)

Here’s what I planted: