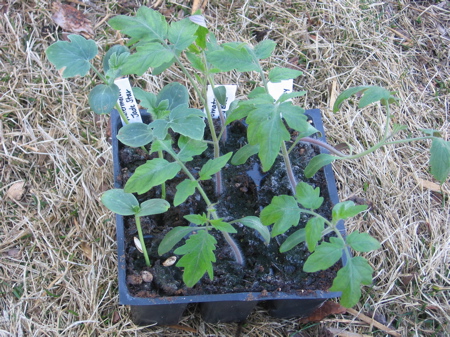
Today was the day to transplant my tomato seedlings, and I think I may have done it a little differently than you might expect. Or perhaps you’ve done it this way all your life and I’m just catching on to it now. Either way, here’s what I did.
Now if you’re wondering when to transplant, my seedlings are now four weeks old and stand about about four inches tall. Ideally, I think you’d want to give them another week or so, and do the big move when they’re about five inches tall. But, I was in a hurry and was itching to get things moving.
First of all, I gave my tomato seedlings one more watering before I transplanted them. Not only does that make it easier on the plant, but it also makes it easier to get out of the container. Then I took my three inch pot (that I was transplanting into) and put just a small layer of dirt in the bottom. So far, not so unusual.
Here’s what you might not normally do. I took my tomato plant and laid it down sideways in the container (as much as I could in that small space). Then I buried as much of it as I could, leaving just the top leaves showing.
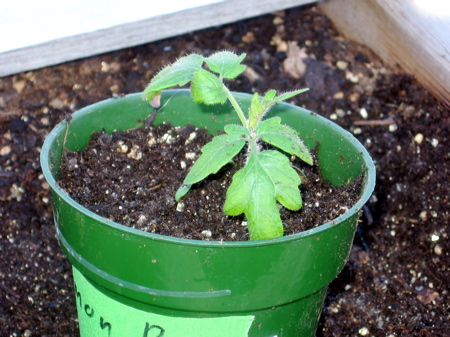
Now, why on earth would I do that? Well you see, when you bury a tomato stem, it will send out roots. These extra roots will make the plant stronger and healthier. To further improve your tomato’s root systems, do this again when you plant him in the ground. Just dig a little trench, lay the plant down in the trench, bury it and keep the top sticking out of the ground.
Don’t believe me? Try it yourself!
15 replies on “Transplanting Tomatoes”
That’s what we do at our house! :)Then we bury them again when planting in the garden! Some people believe that a fish head in each hole helps as well…..I think fish meal would work just fine!!! Hope you had a great weekend enjoying the weather and getting ready for the season!!! 🙂
I do that too! A little differently; I start mine in newspaper pots, and then move them to a creamer container with the sides slit and folded down. As the plants grow, I tape the sides back up and add more soil. I tried it for the first time last year with 2 plants, and am completely sold on the method!
~Sarah
Newspaper pots, eh? Never heard of them… Sounds like a great idea though!
What a helpful site. I love home grown tomatoes and your advice will certainly help me grow better ones. This may be a stupid question but why don’t you transplant the seedlings directly into the garden (rather than into the three inch pot)? Also at what point do you move them from the three inch pot into the garden?
Hey Jennifer, that’s a great question! You certainly could transplant directly into the garden, but most of the time when I’m transplanting into the 3 inch pot, it’s because it’s still too cold outside. The earlier you can get your plants started, the more tomatoes you get. That means the plants are quite large by the time you’re ready to transplant into the garden.
I did transplant my tomatoes in the garden yesterday and having done this technique when I transplanted to bigger pots earlier, I was amazed by all the new roots and the overall plant. Thank you for your tips on tomatoes, (like the seven essentials) I has dramatically increased my production (more tomatoes to eat!) Now let’s hope we’re done with the snow! (can’t really get accustomed to snow in may 😉
I bought 3 Early Girl Tomato plants in 5-6in pots. They were 12-15inches in height. I water them for about a week or two in those pots. Then, it warmed up outside, so I tried replanting them in very large pots, that trees came in. They had a large root system going already. I placed potting soil/peat moss in the bottom 3 inches of the large pot. Then, I removed them from the smaller pots, placed them in a depression I made in the potting soil, and filled in more of same around them. I watered them well right after, and placed them outside in a sunny spot. All three of them started withering and drooping right away. I did place a rod along side each plant and used twist ties to secure them. It is now 2 & 3 days since replanting them, and they look worse each time I check them. They already had blossoms growing, when transplanted. Did I do something wrong, or do you think that they will recover from the wilty condition they are experiencing?
[img]https://www.albertahomegardening.com/wp-content/uploads/2011/05/Transplanted Early Girls 001.JPG[/img]
[img]https://www.albertahomegardening.com/wp-content/uploads/2011/05/Transplanted Early Girls 002.JPG[/img]
[img]https://www.albertahomegardening.com/wp-content/uploads/2011/05/Transplanted Early Girls 003.JPG[/img]
[img]https://www.albertahomegardening.com/wp-content/uploads/2011/05/Transplanted Early Girls 004.JPG[/img]
Darrell: My guess is that if you took them from inside to outside at the same time you transplanted them, they might be in shock. Plants grown indoors need to be slowly hardend off. Start with a few hours outside each day… then all day… finally through the night. However, if they had already been growing happily outside, something must have damaged them.
I started my tomato plants indoors too early. We still have
another month before last frost date, and my plants are
already about a foot tall. They have outgrown their pots
but I am wondering if I can transplant them again without
damaging them before finally planting them outside? Also,
could I use newspaper pots at their size? Is a newspaper
pot just crumpled newspaper formed into a pot?
Jacqueline: Sure, you can transplant them again with no ill effects! As for the newspaper pots – I don’t know lots about them. Perhaps someone else can reply to that?
Here is the info on the Lee Valley Potmaker. It’s great for starting seeds but it won’t do the trick for your one-foot-tall tomatoes…
Just transplanting some tomatoes out into their pots today here in Squamish. It’s been cool, but I’ve hardened them off a bit. I’m excited to try the planting-on-the-side thing! Thanks for the tips!
Ooops, I forgot the link…
http://www.leevalley.com/en/garden/page.aspx?p=10566&cat=2,44713,40757
Ciao!
I am new to gardening, so my knowledge is very limited, but the way I was shown to start my tomato seedlings, is to skip the tiny starting trays and state them straight away in a 3 inch pot, filled 3/4 of the way with soil, then as the seedlings shoot up, slowly add more soil to the pot, essentially doing what you are doing by planting it sideways after transplanting. This method saves one transplant for sure, it’s a tried and true method used by an avid gardener friend. 🙂
Hi great site iam in Creston B C started my seeds in pint cream cartons cut them down to 3″ tall 1″of dirt seed when they start to come up i wait till there 1″ tall then i put soil around them and tamp it down easy then water I have a grow light 2″” above them all the time each time they come up a 1″ or so i add mor soil and damp them easy as well I hve covers for them when i plant them out I dont know if this going to work he he but we”ll see